Do you like real cucumber pickles? Not the “quick pickles” made with a hot vinegar solution and canning, but the really yummy kind you get out of a barrel at the deli? Well those are made by fermentation, and I made a happy discovery last year that turnips, radishes and celery root ferment into the most delicious pickles too! They have a flavor all their own — a really tasty one.
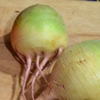
In this example I used the watermelon radishes and celery root we’ve been getting in our shares, and got some turnips at the market. We do get turnips in our CSA shares periodically so remember this recipe when that happens because they are just the best when fermented into pickles! You can ferment any kind of radish too, by the way (regular red, French breakfast, Daikon) so keep that in mind for future boxes as well.
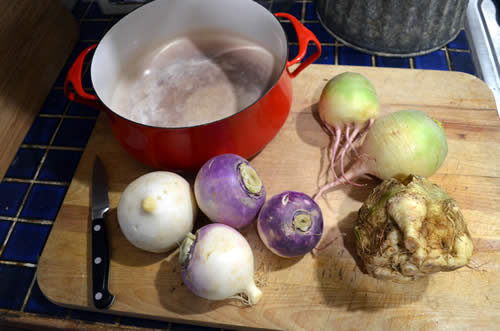
Scrub the turnips and radishes as needed, cut off tops and tails, and use a peeler on any iffy spots but otherwise you can leave the skin on if it is tender and clean. (Not so the celery root — ya have to cut off all the gnarly stuff).
See if you can find in your kitchen a bowl (or pot) and plate combo where the plate fits snugly inside the bowl; this will come in handy when brining (the first step) as it makes it easier to keep the veggies down in the brine (they want to float), but is not absolutely necessary. (Alternatively you could just brine them in a pot with a lid.)
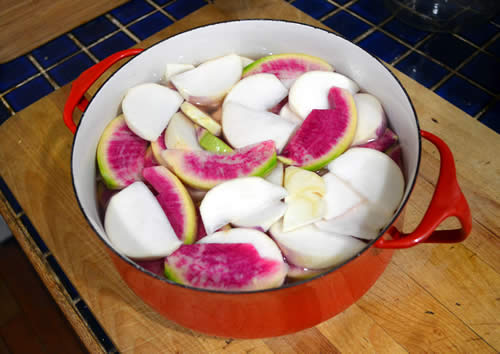
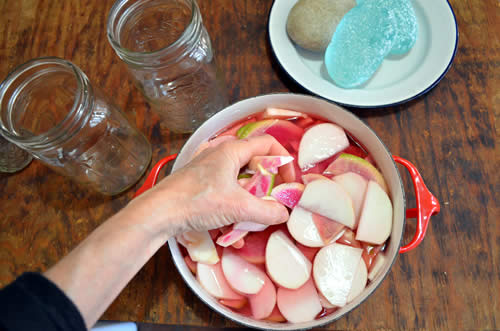
Cut the turnips and radishes into wedges, and the celery root into pieces of roughly similar thickness and accumulate in aforementioned bowl/pot. Optionally, peel and toss in a few whole garlic cloves. (I didn’t add garlic in this example, but you’ll learn why a little further down.)
Make a brine (brine is just salt and water). For this type of ferment, I use a fairly salty brine: 1 tablespoon salt per cup of filtered water. Don’t use tap water – it has chlorine in it and will kill off the good bacteria you want to develop. In a similar vein, check your salt — avoid salt that has “anti-caking agents” in it (believe it or not, salt will actually have an “ingredient list”. Check it. It should only contain “salt” or “sea salt”). Stir it until the salt has completely dissolved into the water.
How much brine should you make up? However much you need in order to cover the veggies in the pot. I start with two cups, and if that’s not enough, I just make more.
So anyway, make brine and pour it over the cut up veggies until they are just covered. You’re going to soak them in the brine overnight.
Here’s where the plate comes in handy — it helps to keep the veggies fully under the brine (they tend to float). Put the plate on top and add some weight. Mind you, this is not a critical step (like the actual fermentation stage where you do want to keep your veggies fully submerged). The veggies on the surface are still mostly surrounded by brine, so don’t sweat it if you don’t have a plate/pot combo. Just put a lid on the pot and it will be fine.

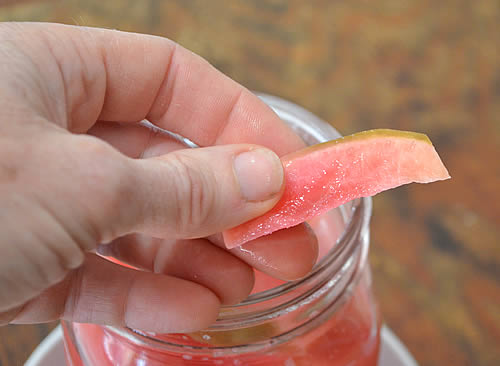
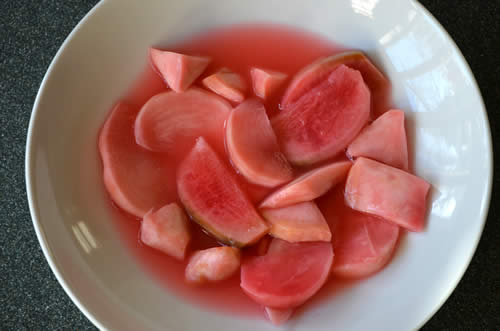
As the veggies soak, they will soften. Note how by morning the brine has come up over the top of the plate. Note, also, how it is turning pink from the pigment in the radishes! Cool, huh? By the time they’re done fermenting, the snow-white turnips will have absorbed the radishes’ pink hue, and the magenta radishes will have lost most of theirs to the brine such that they are hard to tell apart in the end! (See very last photo.)
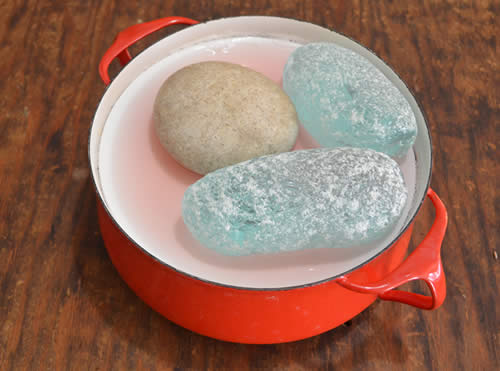
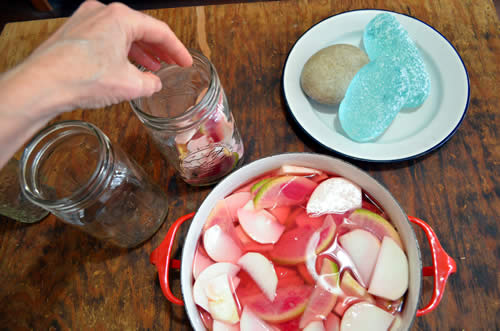
Next day sometime, gather your equipment: some wide-mouthed quart jars, and some skinnier jars that fit inside the jar mouth (for weighting the veggies down while they ferment).
Scoop the veggies out of the brine and start packing them into the jars. Remember, they’ve softened up so this is easier than you might think. (Harder in these pictures though, because I’m trying to do the packing with one hand while taking the pictures with the other!) Don’t pack the jars too full — leave yourself a good 2 inches of headroom so when the brine expands you don’t lose it all (more on this below).

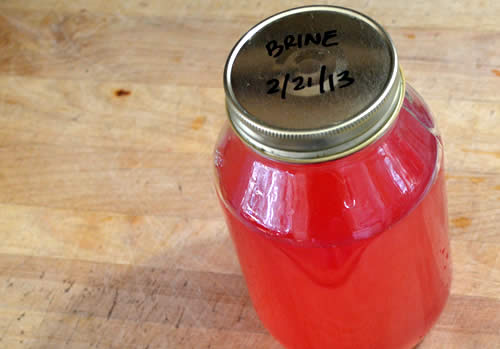
And don’t throw out that brine! Save it for future ferments! (again, more below.)
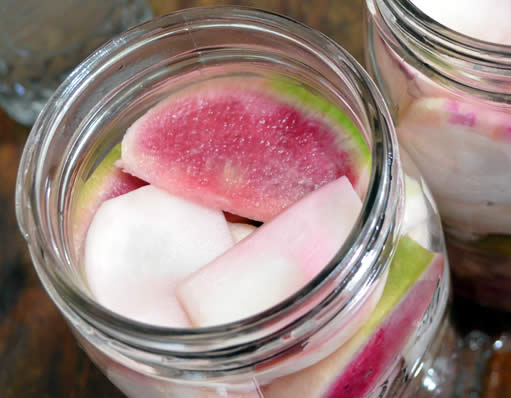
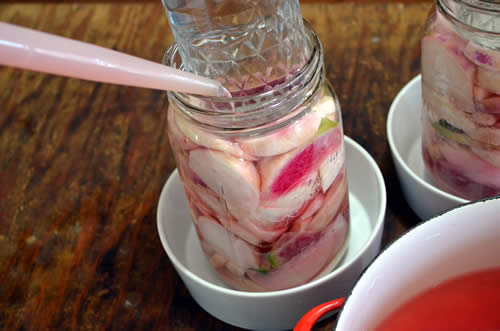
Save off a few of the larger wedges and lay them flat across the top of the veggies in the jar so that when the weighting jar is added, nothing pooches up alongside it (remember, the veggies still want to float, but during the fermenting process you want to keep them submerged).
Next, fill your weighting jars with water and set on top of the veggies. Then using a turkey baster (or measuring cup — anything with a spout), add brine until it juuussst comes up to the top of the veggies. You don’t need to cover the veggies with an inch of brine (like they say in the books) because as the veggies ferment, the brine level will rise on its own and create the necessary “cover.”
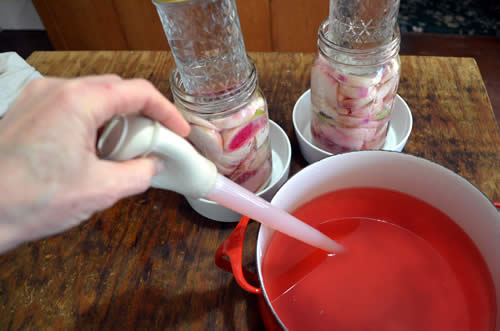

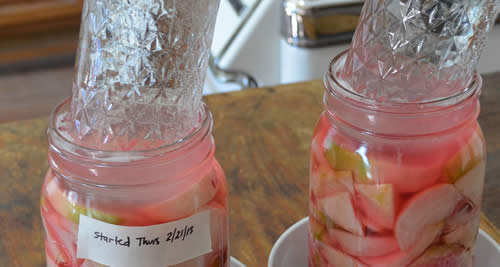
It’s always a good idea to place thusly prepared jars of veggies in some sort of bowl or dish, because like I say, that brine level WILL rise, so no matter how carefully you have planned for this, invariably it overflows some. Better to have a bowl to catch the overflow than wake up in the morning to a puddle!
Label your jars with the date you started the fermentation (i.e. the date you packed them into the jars, not the date you started brining them). If you have a good memory, you can skip this step, but I quickly forget — “was that Monday or Tuesday when I started them?”

Now leave the whole shebang out at room temperature and wait. I usually give it 5 – 7 days. Timing is not exact; if your kitchen is warm, or it’s summertime, you might only need to ferment them 4 or 5 days; if it is winter or your kitchen is not that warm, you can let it go 6 or 7 days. If you went 8 days it’s not like they’ll suddenly go “bad”, so don’t fret. In this example they were actually “done” in 3 days; I’ll explain why after I digress here to discuss left-over brine.
Regarding saving the left-over brine: you can strain it through a little cheesecloth to remove any oddball veggie particles and such, then put it into a jar, label it with the date and stick this in the back of your fridge. Next time you go to ferment some more veggies, pull it out and use it in the soaking step, supplementing with additional new brine as needed. What’s fun about this is that, over time, the brine develops complexity from the history of all the various veggies you’ve soaked in it and this is cool!
I actually pulled one jar of brine out of my fridge that was over 6 months old — I was going to toss it because it looked like a forgotten science experiment (wish I’d taken a picture for you): white scum on the surface, plus some unidentifiable lumpy stuff had settled into a murky layer down in the bottom; yeech. But when I opened it to dump out, I gave it a sniff and wow – it actually smelled wonderful!! So I thought, hmm. The brine between the scum and murk was crystal clear, so I carefully scooped as much of the scum off as I could with a paper towel, then using my turkey baster I gently siphoned the clear brine off into a separate jar, leaving the alien gook at the bottom undisturbed. Once the clear brine was safely removed, I examined the gunk more closely and realized it was just a bunch of garlic cloves and peppercorns I’d purposefully left in the brine from an earlier ferment (I’d just forgotten), and they’d simply started to break down. But the garlic was why the brine smelled so good!! They’d given their essence to it! I even took a sip, and it was deliciously sour/salty and garlick-y; I’m so glad I hadn’t thrown it out! So backtracking to that bit at the beginning where I say to strain used brine through cheesecloth — you don’t have to do that, but FYI stuff left in the brine will settle and deteriorate over time (as the above-mentioned garlic cloves did).
Oh, and by the way, when you’re done eating your pickled veggies, save that brine too — it’s the most flavorful of all! That’s what the “science experiment” brine was. Fermenting is a pretty forgiving process, as you can see!
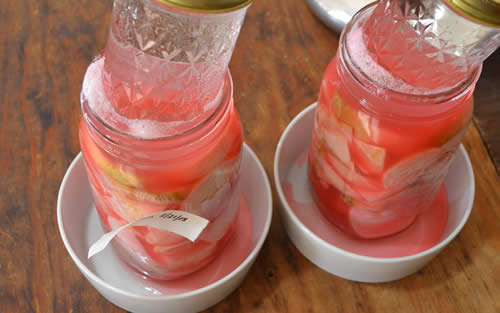
Next day: note the rise in brine level. Note the bubble foam forming around the top.
Day two: See what I mean about overflow? the brine has spilled over the edge (causing my label to keep falling off).
Part of figuring out how long to ferment your veggies is keeping an eye on how “active” it is. So swipe off the foam after 2-3 days with a finger or a piece of paper towel or something, then see if foam continues to form.


Look closely at the side of the jar too; notice little pockets of carbon-dioxide bubbles? Take a moment to simply observe — you will likely see bubbles actively rising up the side of the jar. It’s Alive! It’s so exciting!

Of course the two most reliable ways to judge how your fermented veggies are coming along are Smell and Taste. Fermentation master Sandor Katz will tell you this. Use your senses. Is it starting to smell sour? Lift off the weighting jar, snag a piece of veg and taste it. Or stick your finger into the brine and taste it that way.
Does it still taste mostly salty? If yes, put the weighting jar back in and let it ferment longer. Check it again the next day. Does it taste sour and pickle-y yet? If so, remove the weighting jars, put a lid on the veggies and stick them in the fridge. They will continue to ferment slowly in the fridge, improving in flavor (so you can enjoy them over a month or three if you like — though mine never last that long ‘cuz I snack on ’em most every day).
A thing that will impact speed of fermentation is whether you started with fresh brine or used brine from prior ferments – as I did in this batch. Used brine — especially if it is what was left in the jar after you’ve eaten all the pickled veggies out of it (as opposed to brine that was only used to soak the veggies in the beginning step) — will have lots of active bacterial culture present (not unlike a sourdough starter) and consequently will jump-start your ferment. THAT’s why my ferment here took only 3 days.
If you don’t have used brine to work with like I did, don’t let this deter you! Lactobacillus is everywhere, in the air, on surfaces, etc, so when you start a batch of fermented veggies with fresh brine (i.e. saltwater you’ve just mixed up), the bacteria (which are salt tolerant) will do their job and ferment your veggies just fine — it may just take a little longer than if you use “used” brine, that’s all.
Oh, and one last thing – people always fret that the brine goes “cloudy.” Don’t fret — that’s perfectly normal. It has not gone “off” or “bad”; it’s simply the result of lactic acid bacteria doing their thing (lactobacilli convert lactose and other sugars from the vegetables into lactic acid, which is what gives your ferment that lovely sour taste, which is further flavored uniquely by the type of vegetables you’ve chosen to ferment).
Whatever you do, enjoy the process — and your pickles! (Hm… think I’ll go snack on some right now!)

