First, evaluate the tenderness of the greens you’ll be using – on the tougher/firmer end of the scale, we have collards and Lacinato (Dino) kale. In the middle are Red Russian kale and beet greens (and greens from veggies like rutabagas), then next maybe chard. On the tender end are things like spinach, mustard greens, radish greens and arugula.
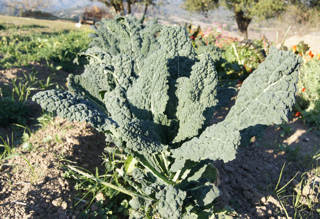
Lacinato Kale in the field.
Generally speaking the tougher/firmer greens will want a longer cook time and the more tender ones a shorter. Cooking time (and technique) also affects the texture of your cooked greens: some folks like their greens al-dente, others silky soft. There are always exceptions to rules (okay, almost always), but if you want somewhere to start, this will get you going!

Rainbow Chard in the field.
Basic technique: boiling
Best for the firmer greens: collards, kale, beet greens. I wouldn’t boil spinach, mustards, or arugula… I might boil chard. Bring a pot of well-salted water to a boil. Wash greens as needed to remove dirt and the occasional bug, then strip greens from stems (grasp stem in one hand, slide leaf through the grasp of your other hand and strip them off – this is MUCH easier than trying to cut the leaves from the stems with a knife!). No need to chop before boiling! (I’ll talk more about this below.) Drop leaves into boiling salted water, turn heat down to medium-ish – it just needs to simmer it doesn’t have to be a roiling boil – and cook 3-5 minutes. (Quantity affects cooking time too, so if you’re doing a larger amount, like a couple bunches at once, it may take a little longer. 3-5 minutes is fine for one bunch of kale or collards.) A longer boil time will make the greens more tender and soft. If you like them firmer, don’t cook them as long. Over time you’ll come to learn what you like best!
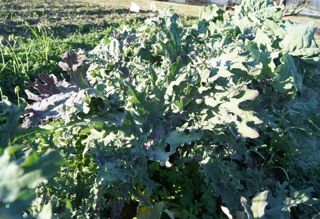
Red Russian Kale in the field.
A note re: pot-size – greens cook WAY down in volume, so you don’t need a giant pot (though at the start it may look like you will). Just add the greens a handful at a time if they won’t fit all at once, and they will quickly wilt and make room for the rest.
Once the greens are cooked to your liking (you can always fish a piece out and try it, just like you would with pasta), drain them well, squeezing out the water by pressing them with a wooden spoon against your colander, then plunk them onto a cutting board. NOW chop them. I find it is WAY easier to chop the greens after cooking than before. If you do it before, you’re working with a large unwieldy pile and have pieces going everywhere; afterwards, however, you have a nice manageable clump which can be chopped as coarsely or finely as you like. This is SO MUCH EASIER.
Basic technique: steaming.
Steaming is great for the delicate greens like spinach. It works fine for the firmer greens too, although I find kale cooked this way to be a little less tender (if you want that ‘silky’ feel, boiling works best). But if you like this al-dente-ness in kale, it’s a great way to go – uses less water, and some say less nutrients are lost because the greens are not immersed in water. I don’t know enough about this fact to say.
The steps for steaming are essentially the same as for boiling, above, except I will sprinkle salt onto the leaves since they’re not immersed in salted water. FYI the salt sticks better if the leaves are a little wet (clinging water from washing is fine, otherwise sprinkle a little in).
Basic technique: sauteing.
Most recipes for sauted greens include other ingredients and the sauteing instructions are a part of the overall recipe, but if you ever want to make plain sauted greens, it’s easy. In this instance, you WILL want to chop your greens before cooking (so it’s a little messier in prep). The most important thing to remember here is that the greens will need moisture – you don’t want to dry-saute them or they come out tough. Water clinging to leaves after washing is usually sufficient moisture. Just heat a skillet or wok with a little oil, then add greens and stir-fry. You can turn heat to medium and put a lid on it for a few minutes (which is essentially steaming them), or continue to stir-fry and watch, adding a splash of more water if it gets too dry.

